As PCs get more powerful and easier to use, the challenges involved with upgrading them have remained about the same. For the novice, a hard drive upgrade can appear downright daunting. For more experienced tinkerers, the upgrade itself may be easy, but it's easier still to overlook factors that could streamline the whole process and better protect both the hardware and the data stored on it.
Last month, in "5 PC Upgrades Almost Everyone Does Wrong," I explored some common upgrade mistakes. Since so many PCWorld readers -- including a lot of seasoned upgrade veterans -- liked that collection of tips, I thought I'd follow it up with some tips that I couldn't fit into the first article. In this piece, I'll take a look at several of the most commonly overlooked details for such tasks as transferring data to a new hard drive, installing a new graphics card, updating your PC's BIOS and the firmware for your other devices, setting up a Wi-Fi network, and keeping Windows Genuine Advantage from botching an otherwise good upgrade.
Transfer Data the Easy Way
In the earlier article, I explained a few of the simple mistakes people often make when they upgrade their hard drive. What I didn't talk about was one of the most significant time wasters in the whole process: data transfer. Transferring the data from your old hard drive to a new, higher-capacity drive can take hours and hours under ideal circumstances, and choosing the wrong method can turn this into a day-long chore. That extra time really matters, since you can't use your computer while the transfer is under way.
For transferring data to a new PC, Microsoft built a utility called Easy Transfer into Windows 7 and Vista. But Easy Transfer isn't very good for transferring data from your old hard drive to a new one, because it requires you to log in and configure the transfer from one drive to another. You could use it to push all the data onto an external disk and then pull it onto the new disk, but then you would be transferring all the data twice.
An adapter like this one lets you quickly connect and disconnect a hard drive to your USB port without screwing anything in.Fortunately, a better solution comes included with drives from major vendors like Seagate and Western Digital. With Seagate's DiscWizard, you install the software on your existing hard drive before you take it out of your PC, and connect the new drive to your PC's USB port with an external enclosure or a USB to SATA/IDE adapter (the cheaper, faster option). Run DiscWizard, and copy your entire disc image to the new drive (this is known as "cloning"). When the process is finished, shut down the PC and swap the new drive--complete with all your old data exactly as it was--in for the old one. The Acronis True Image software that comes with Western Digital drives works in basically the same way.
If you're using an OEM drive that didn't come with a cloning utility, you can buy Acronis True Image as a stand-alone download for $30. It works with any drive.
Don't Forget Your BIOS
I know more than a few hardcore PC modders who are constantly swapping out CPUs, RAM, and graphics cards, but seldom give much consideration to one of the PC's most fundamental components: the BIOS. The BIOS is the basic firmware that tells the computer how to boot, how to check for connected drives, memory, and so on. As with other components, manufacturers often update the BIOS software to support new standards, fix bugs, and add features.
If you've been using the same PC (or even just the same motherboard) for a couple of years, you may be long overdue for a BIOS update. This is especially significant for people who want to add the latest high-speed drives, performance graphics cards, or new CPUs to their systems, but an up-to-date BIOS can also speed up the boot time of your PC even without other upgrades.
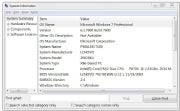
To see if your BIOS is up to date, check the version number that flashes on your screen during the first couple seconds of the boot process, or run msinfo32.exe. Then visit the manufacturer's website and check the support section for new BIOS downloads. These are usually listed by date and version number, making it pretty easy to determine whether you need to update or not. Just be absolutely certain that you're looking at the right BIOS for your motherboard or system model, as attempting to flash the wrong update to your PC could cause catastrophic failure (in most cases, though, the update software will simply tell you that your hardware is ineligible for the update when you've got the wrong version).
Running msinfo32.exe will bring up system information, including your BIOS version and date. (Click for full-size image.)
The actual update process is usually pretty straightforward: Shut down all programs running on your PC, and then run the update utility that you downloaded from the manufacturer's website. This utility will reboot the PC, install the update, and then reboot again. Often you'll see an immediate difference in the way the initial splash screen looks, which is a good confirmation that you've updated successfully. In some cases, you may need to copy the utility to a bootable drive (a CD or thumb drive, for example) and install it from there. In either case, make sure you don't disconnect the power cable or interrupt the update process in any way once it starts, as interrupting an update in midinstallation will typically brick your PC.
For more on updating your PC's BIOS, see Patrick Miller's excellent tutorial, "How to Upgrade Your BIOS."
Avoid Graphics Card Mishaps
More than almost any other PC component (except maybe the CPU), graphics card upgrades are often prone to basic human errors. That's because graphics card technologies change rapidly as manufacturers develop new breakthroughs to satisfy the demands of hard-core gamers. So these little (sometimes big) cards can befuddle upgraders on a number of fronts.
A graphics card upgrade can go awry in at least four common ways:
- Wrong bus interface.
- Wrong power connection(s).
- Wrong size.
- Wrong OS version.
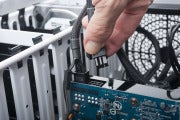
If you're looking to buy a new graphics card, you need to make sure that your PC will support it on all four of the above fronts. Most importantl, be sure to buy the right interface. An older computer (and some newer budget PCs) may have an AGP interface rather than a PCI-Express one. Because many cards come in both AGP and PCI-Express versions, look carefully at the box or online listing to be sure you're getting the right one for your PC.
Older and low-cost computers often have fairly anemic power supplies that are incapable of supporting the latest high-powered graphics cards. Check the power rating and connector type for any card you buy and make sure the power supply in your PC lives up to it. If it doesn't, you may need to replace your power supply before swapping out your GPU. Be wary of using any power cable adapters that come included with some graphics cards, since they can't compensate for an underpowered power supply. For more on this issue, see the power supply section of "5 PC Upgrades Almost Everyone Does Wrong."Here's another basic issue: Make sure a new GPU card will fit into your PC's case before you buy it. People with slim PC towers often fall prey to this fundamental blunder.
Finally, make sure that the card you buy includes drivers for your PC's operating system. As Microsoft and graphics card makers continue to release new versions of their products, they don't always stay in sync, and some of the latest cards simply won't run on older versions of Windows.
If You Have to Reactivate Windows...
After a major hardware upgrade, Windows may prompt you to reactivate the OS with Microsoft. This is Microsoft's way of cutting down on piracy, and--while it can be annoying for a frequent upgrader--it shouldn't pose much of a problem in most cases. Here's what you need to know.
Upon initial activation, every Windows license is recorded in Microsoft's database (and on your PC) along with basic information about the PC it's installed on, such as the kind of motherboard, CPU, graphics card, and so forth, along with serial numbers of some components and other bits of data. This is sort of like a fingerprint for your PC, and Windows checks it against your actual, current configuration every time you start up. If certain elements (or too many elements) of your configuration change, Windows will ask you to reactivate the license.
In most cases, reactivating Windows involves little more than clicking Activate Now. You may need to enter your administrator password, and possibly the activation code that came with your copy of Windows.
If you've swapped out a major component, such as your motherboard, you may be prompted to phone Microsoft to reactivate. Don't freak out. I've done this myself after a complete system rebuild with all new hardware (except the hard drive and case), and the Microsoft support people didn't give me a hard time. Just explain what your situation is and they'll take care of you.
The main thing to remember is that Windows reactivation is a fairly normal part of a major hardware upgrade, so prepare for it in advance by having your Windows activation key and admin password handy before you start the upgrade. Unless you're using a copy of Windows that's not your own, that came with an OEM system, or that's still installed on another PC, Microsoft is very unlikely to hang you out to dry.
Finally, Avoid Common Wi-Fi Upgrade Woes
In the past decade, home wireless networks have gone from being esoteric, cutting-edge technology to essential household equipment. But some of today's most prevalent Wi-Fi mistakes have been with us since the beginning.
Even now that Wi-Fi is everywhere, the most egregious wireless flub we see is also the most basic. People buy a wireless router, take it out of the box, plug it in, and start using it without changing a single system setting, including the administrative password. This is shocking (or would be, if it weren't so unsurprising), since it leaves the network wide open for anybody within wireless range. So please spread the word to your less technically inclined friends, and get them to--at least--set a secure password on their router's admin account.
An even more common problem in the world of home wireless networking is a failure to update the router's firmware. Most 802.11n routers include a pretty simple administration menu to check for and install new versions of the firmware that runs the router itself, yet hardly anybody ever uses it. If you can't recall the last time you updated your router, log into it and look for a tab or menu option labeled something like Firmware or Update (the terminology varies from device to device, so check your manual if you don't spot it). Typically, you'll need to click a button to check for new firmware, and then click an option to install a new version if there is one. Leave the router alone while it does its thing, and it'll reboot itself automatically when the update is complete. In most cases, there will be no need to reenter any settings after the update.For more on protecting your wireless network, see Becky Waring's "How to Enhance and Secure Your Wi-Fi Network."
Friday, November 4, 2011
5 More PC Upgrade Mistakes (And How To Avoid Them) | PCWorld
via pcworld.com
Subscribe to:
Post Comments (Atom)


No comments:
Post a Comment